How to Create a Role: Step One
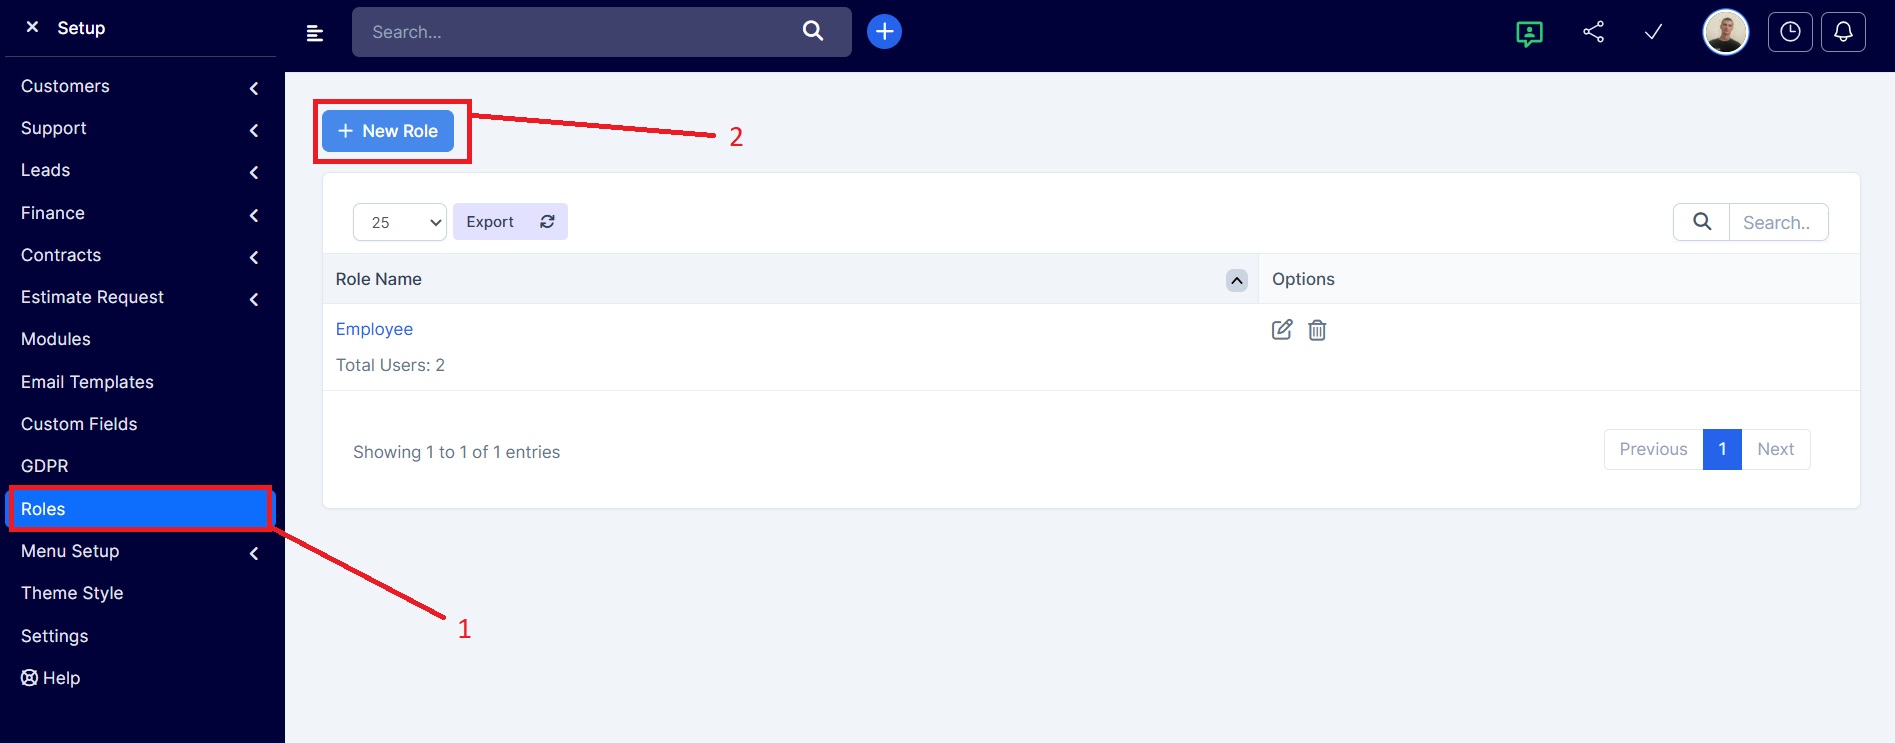
Go to Setup → Settings → Staff Roles to view the table of all existing roles in the system.
At the top of the page, click the New Role button to create a new staff role.
Go to Setup → Settings → Staff Roles to view the table of all existing roles in the system.
At the top of the page, click the New Role button to create a new staff role.
Creating a New Role — Access Permission Settings
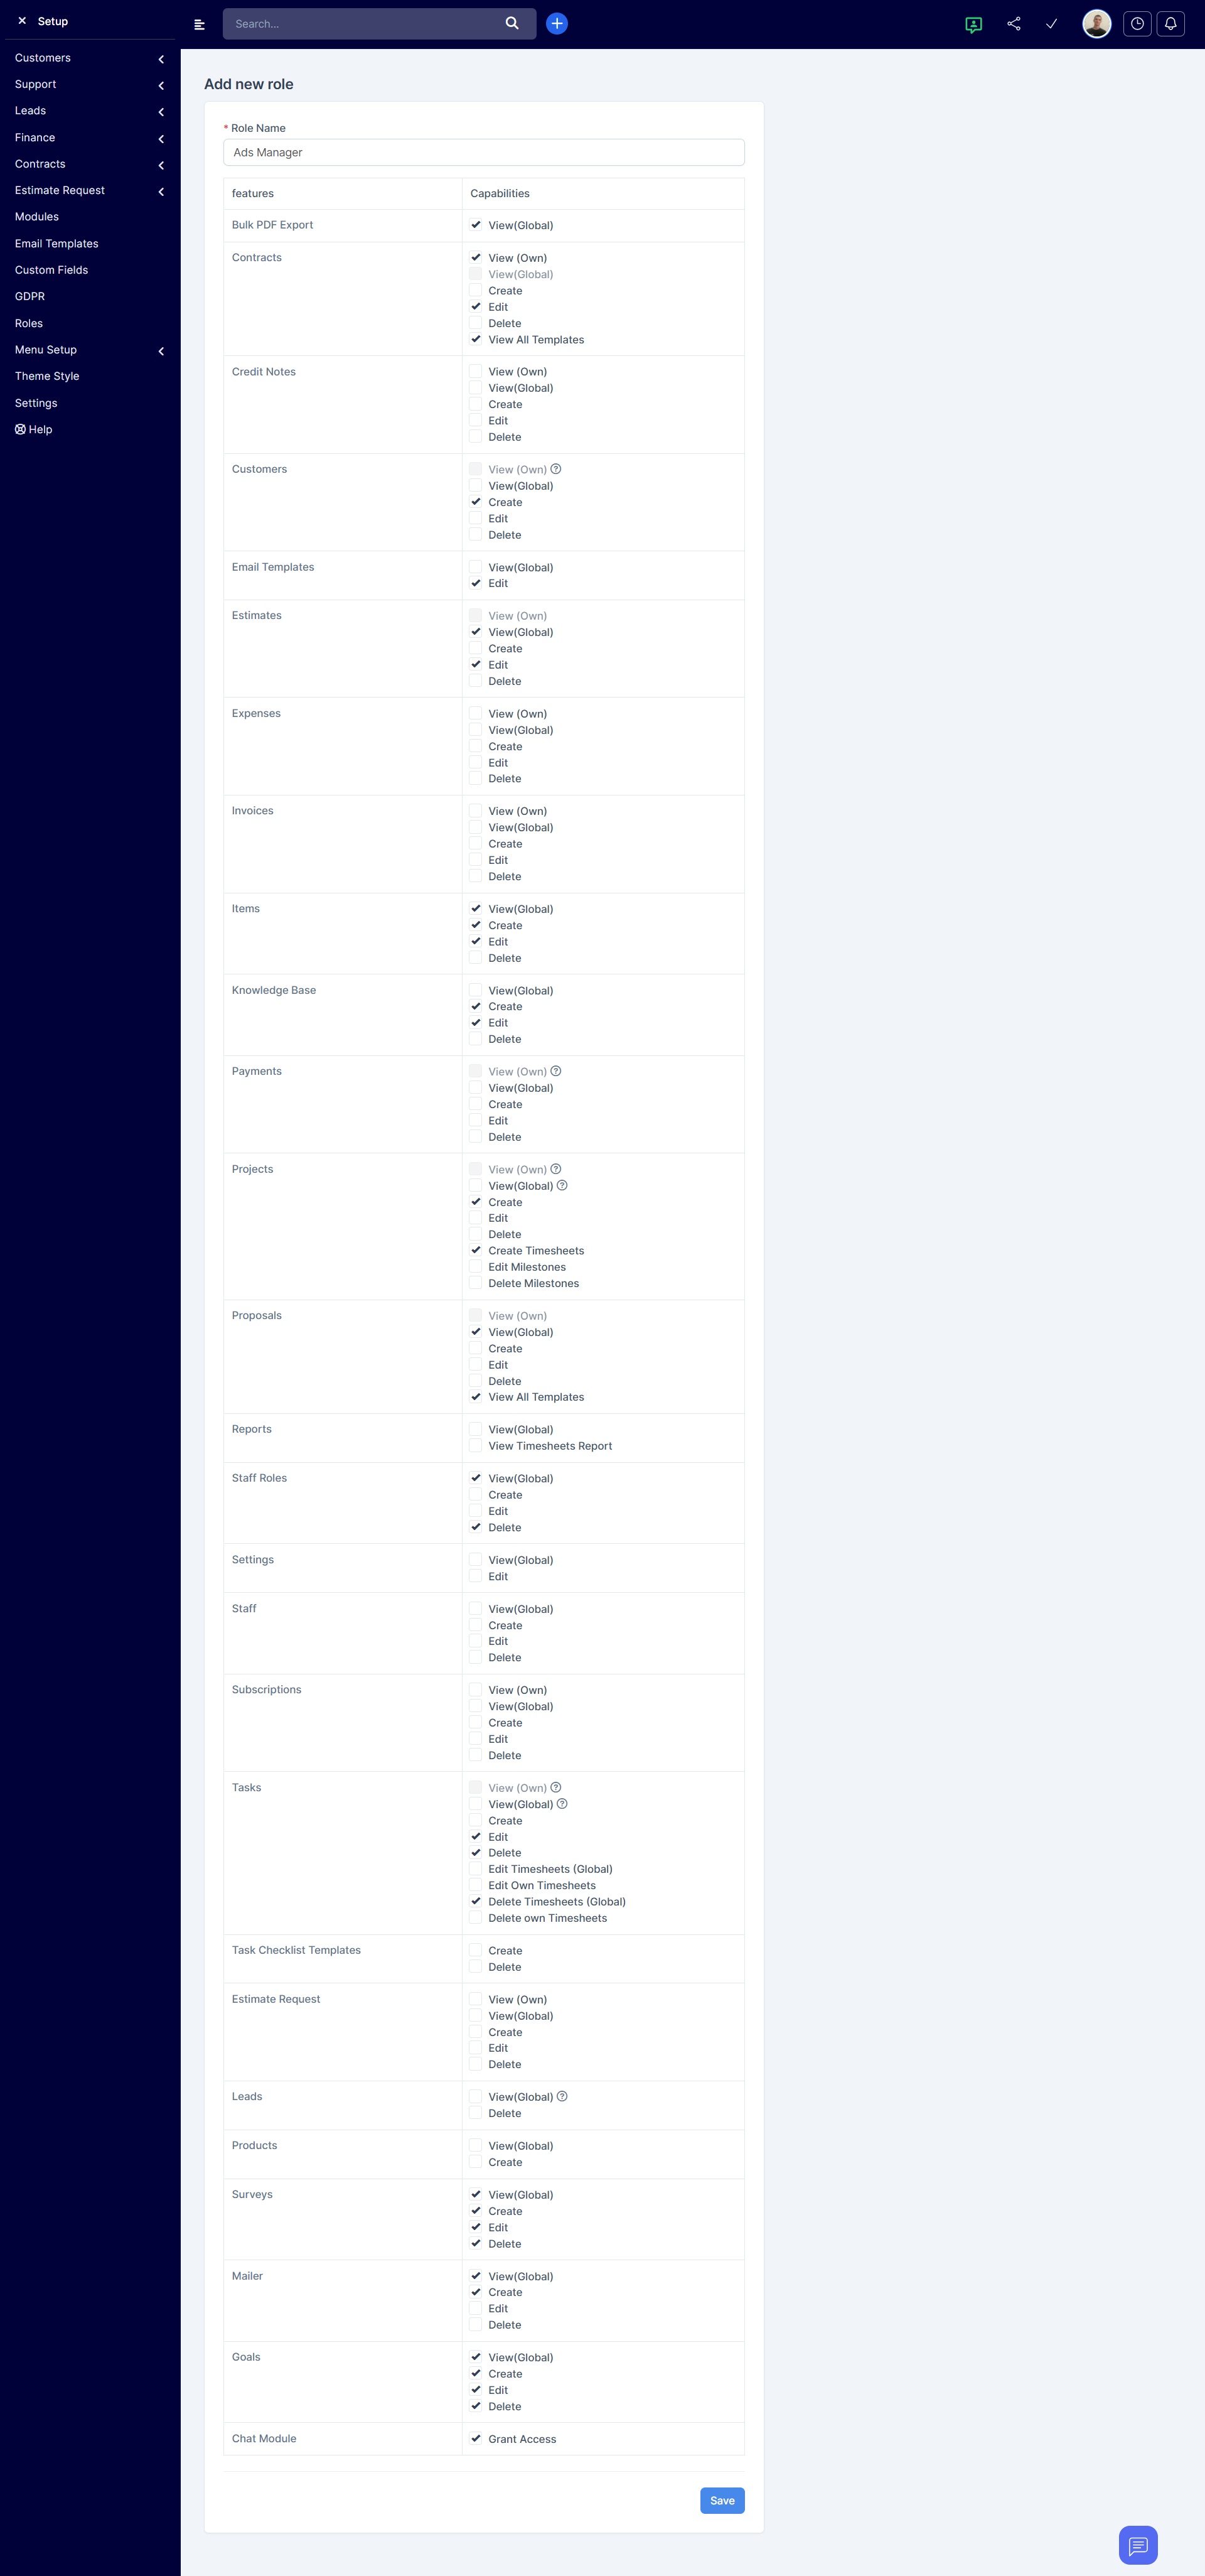
After clicking New Role, the Add New Role form will open.
Here you need to:
-
Enter the Role Name — for example, Project Manager, Accountant, etc.
-
In the table below, set permissions for each module and action.
Permissions are divided into two main columns:
-
Features — system modules: Customers, Tasks, Projects, Payments, Contracts, Reports, etc.
-
Capabilities — access levels: View (Own/Global), Create, Edit, Delete.
✅ For example:
-
Customers — allow viewing only own customers and creating new ones.
-
Invoices — allow creating and editing all invoices.
-
Tasks — grant the right to edit only own timesheets.
This allows you to precisely configure access for each role according to the employee’s responsibilities.